When it comes to getting your slab right, the devil’s in the detail and propping is one of those details that can make or break your floor performance. It’s not just about holding things up while the concrete cures. It’s about getting more from your deck longer spans, thinner gauge, less bounce, and a better finish.
Whether you’re building a single-storey smallworks project or a multi-level commercial build, understanding when and how to use propping can save time, reduce material costs, and prevent a lot of pain down the line.
What is Propping in Metal Decking?
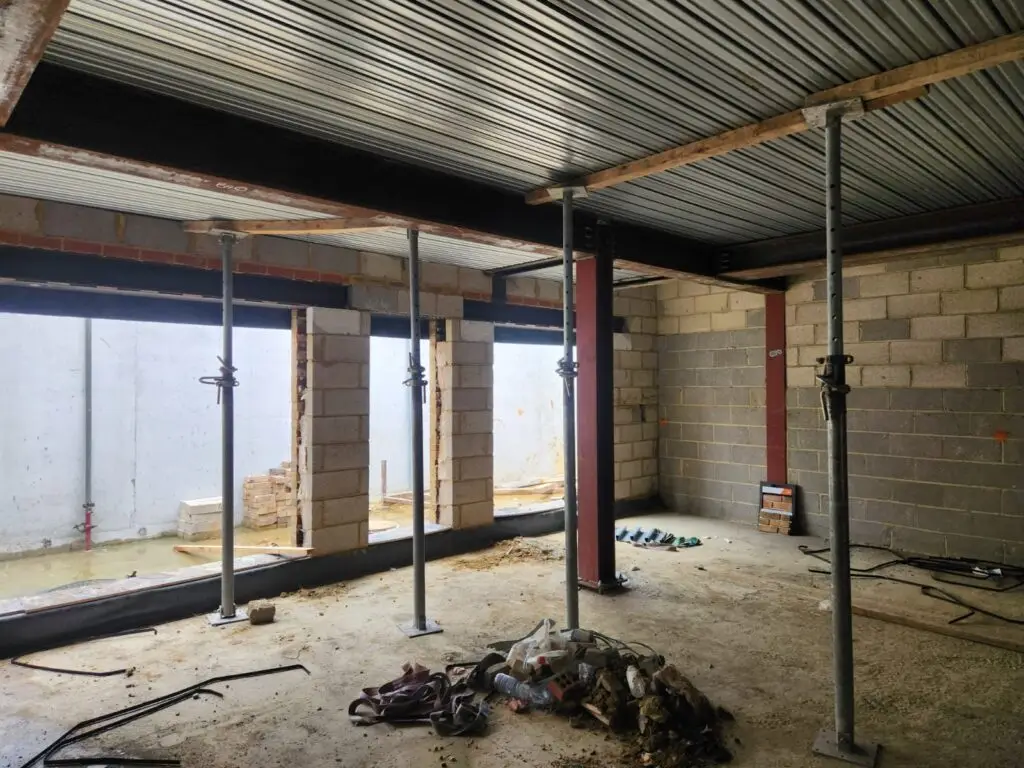
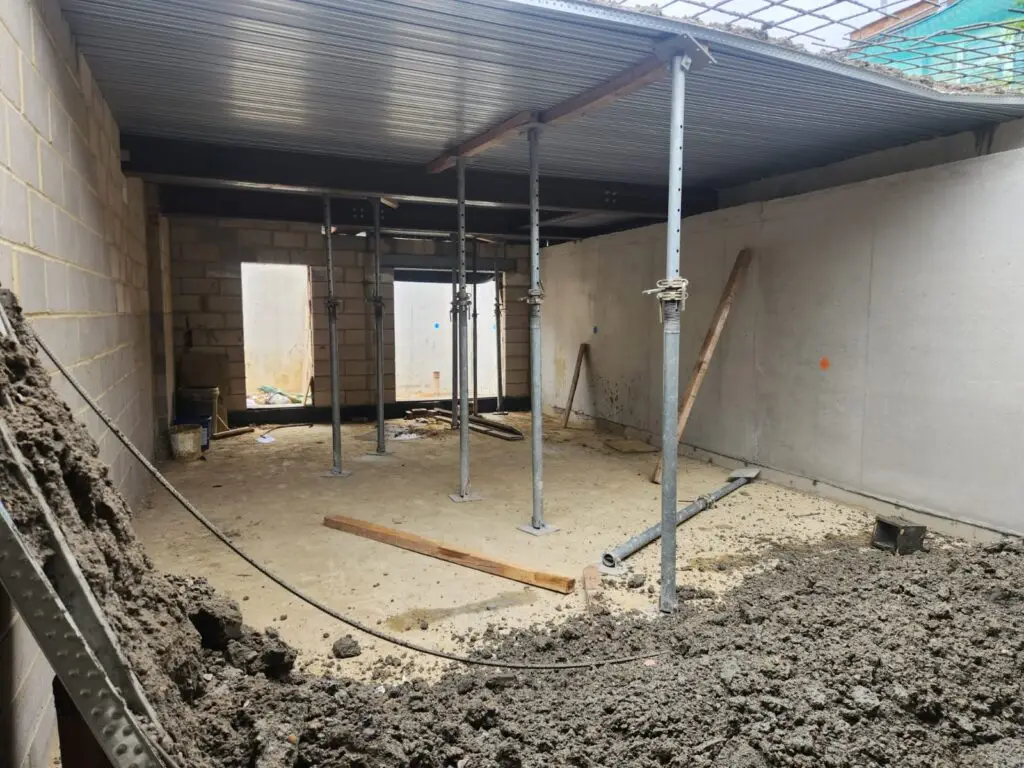
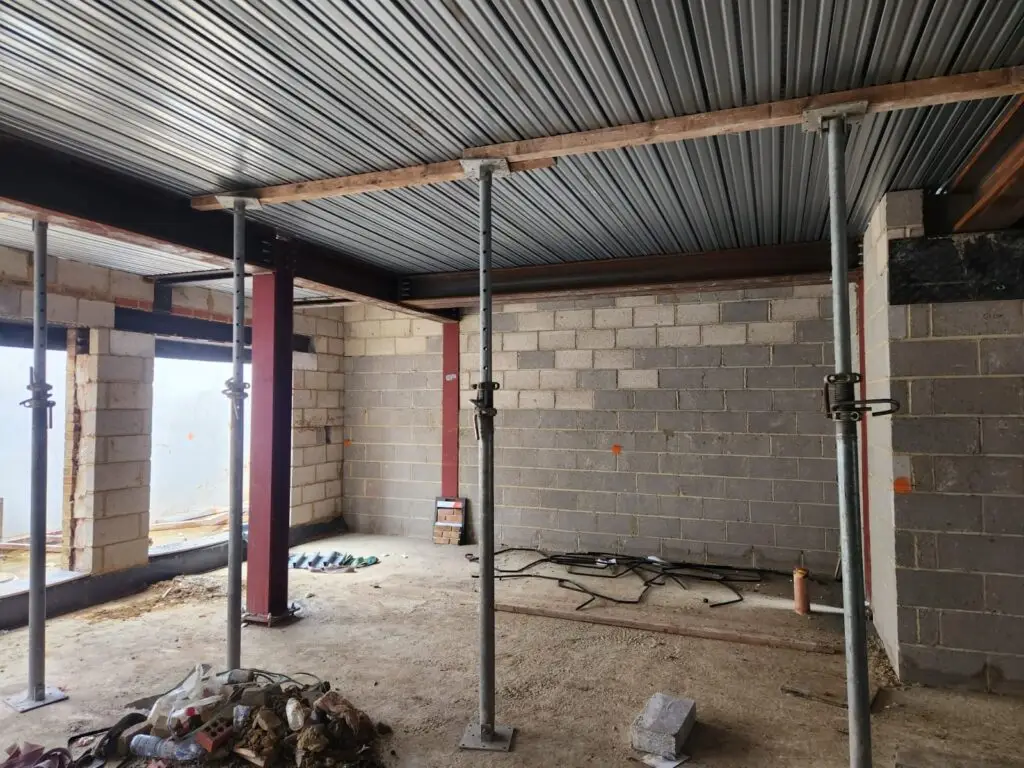
Propping means temporarily supporting the metal deck during the concrete pour. Think of it as giving your slab a helping hand while it sets up to carry load permanently.
Why Propping Works
1. Reduces the Load During Curing:
When wet concrete is sitting on the deck, it’s heavy about 2.29kN/m² according to real project data. Propping cuts down the bending moment on the deck during this stage, making it easier to hold the load safely.
2. Increases Span Capacity by 25 – 40%:
That’s right you can stretch your spans significantly. A profile that spans 3.0m unpropped could potentially reach 3.75 – 4.2m with proper temporary supports.
3. Minimises Deflection:
Propping limits the sag in your deck before the concrete sets. That means better floor levelness, less ponding, and easier finishing.
When You Should Prop
- One-level smallworks? Definitely consider it. Easy to set up and brings real performance benefits.
- Multi-storey jobs? Be cautious – propping can obstruct mesh placement, concrete pouring, and movement between levels.
- Anything over 150m²? Aim to eliminate propping by choosing the right gauge and span. It’s more efficient in the long run…..probably – we’ll help you define whether it will save on time and money or inhibit progress and cost more!
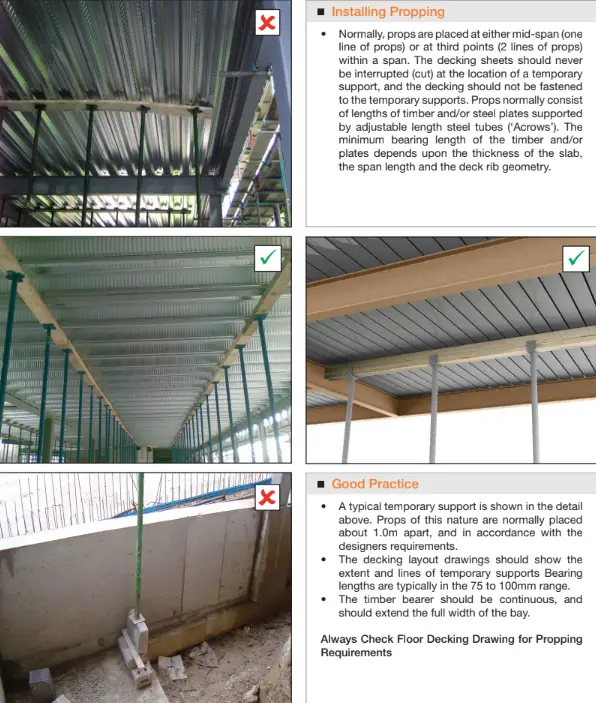
Key Propping Guidelines
- Single line or double line? Depends on the span. Mid-span usually works; third points if needed.
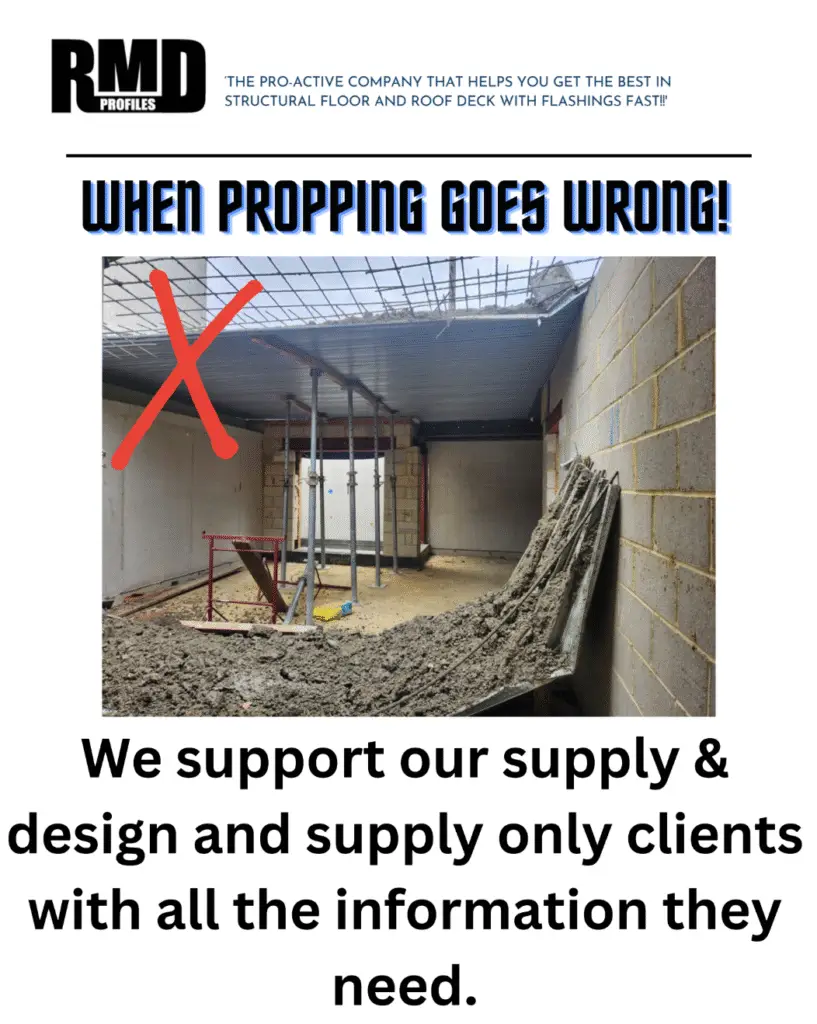
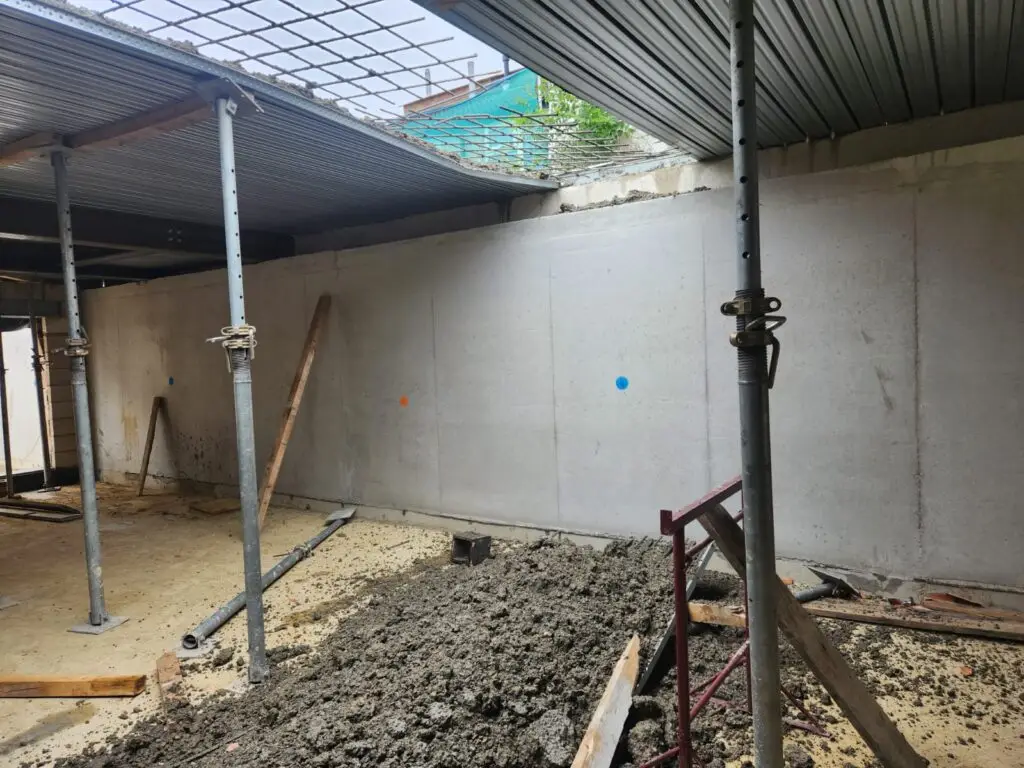
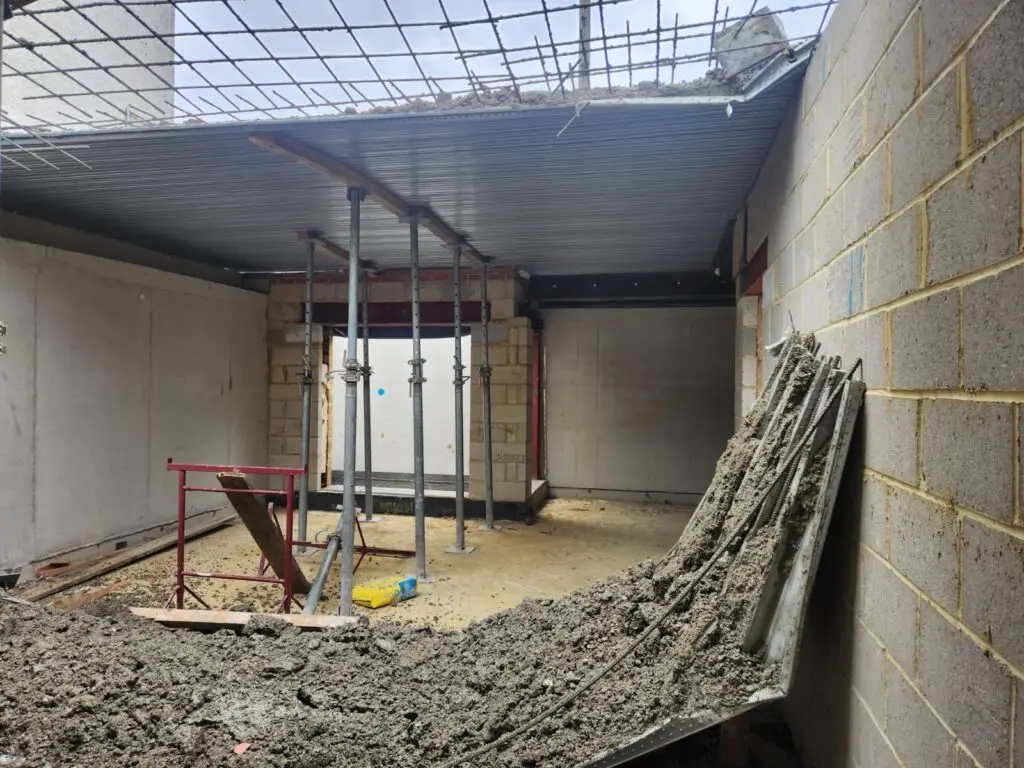
- Don’t cut the deck at the prop! That’s a common mistake and it weakens the deck’s performance.
- Use proper Acrow props and timber bearers. Sketchy supports = risky slab.
- Spacing: About 1m between props. Use continuous timber across the width of the bay.
“One bad prop job can ruin the slab- and the schedule.” – RMD Profiles
Real-World Example
In a 140mm slab build in London, a MetFloor® 80 profile achieved a 5.15m single-span with one line of props. The slab passed all Ultimate Limit State (ULS) and Serviceability Limit State (SLS) checks with room to spare. Without props, this setup wouldn’t fly.
The Takeaway
Propping is powerful but only when done right. If you’re building small and want to stretch the deck without upgrading profiles, it’s worth it. If you’re going big, think twice…props can slow down follow-on trades and complicate the pour on upper levels.
Want help designing a layout that works-whether propped or not? That’s what we do. RMD Profiles gives you the drawings, calculations, and the deck- fast.